

The SDK can be found here: https://github.com/nuubit/SDK/
Self Service Signup: https://portal.nuubit.net/#/signup/plans
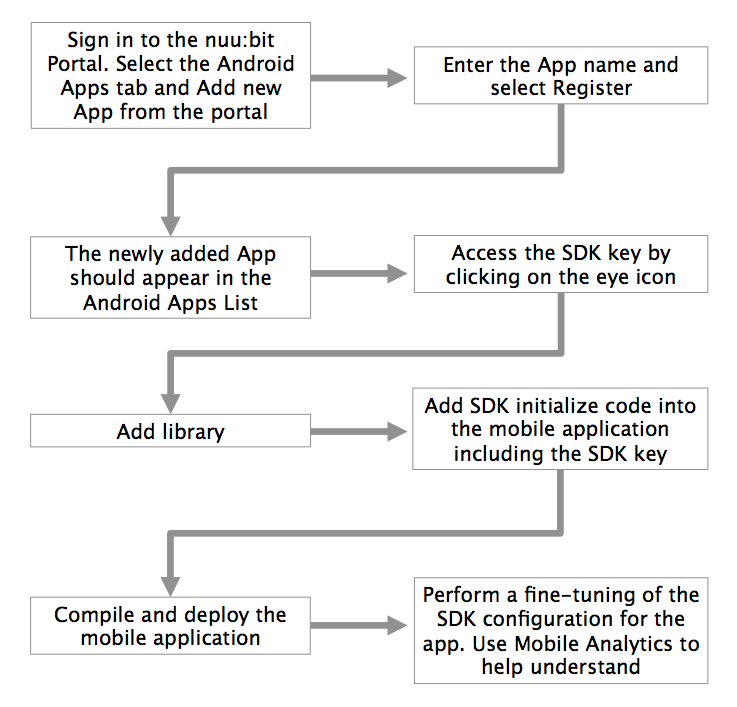
The goal of this document is for a developer to get the nuu:bit Android SDK implemented quickly in their Android application. The figure below is a high-level level diagram of the workflow:
Before starting we highly recommend to review the SDK F.A.Q. article.
Step 1 - Sign into the nuu:bit portal (https://portal.nuubit.net/) using your existing nuu:bit portal credentials.

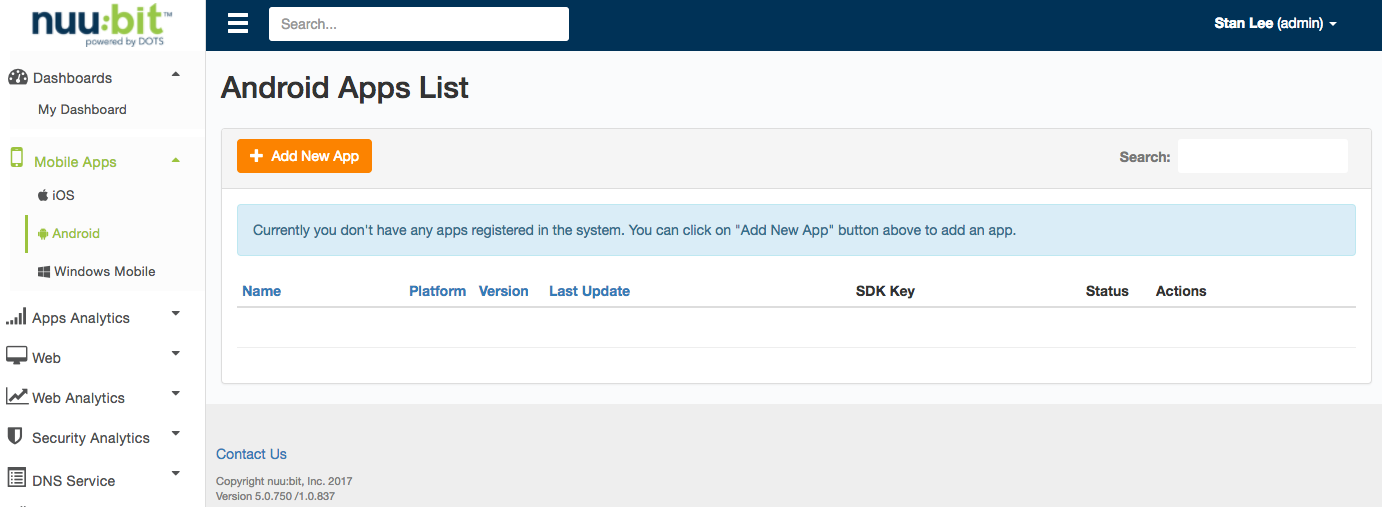
Step 2 - Select the "Mobile Apps" tab from the top of the portal page. Choose the operating system from the left of the column (currently only Android SDK is provided/supported).
Step 3 - Select Add new app button:

Step 4 - Enter the App name - in this example below, the App is called “My Example Android App”:
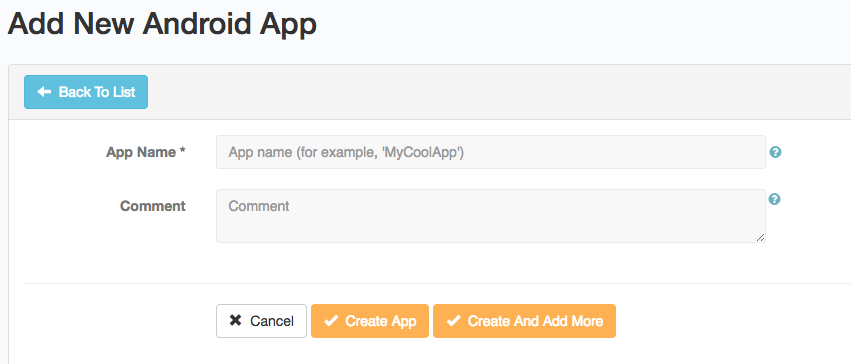
Step 5 - Once the App is registered on the nuu:bit Platform, use the “Create App” button.

Step 6 - The newly added App should appear in the iOS Apps List.
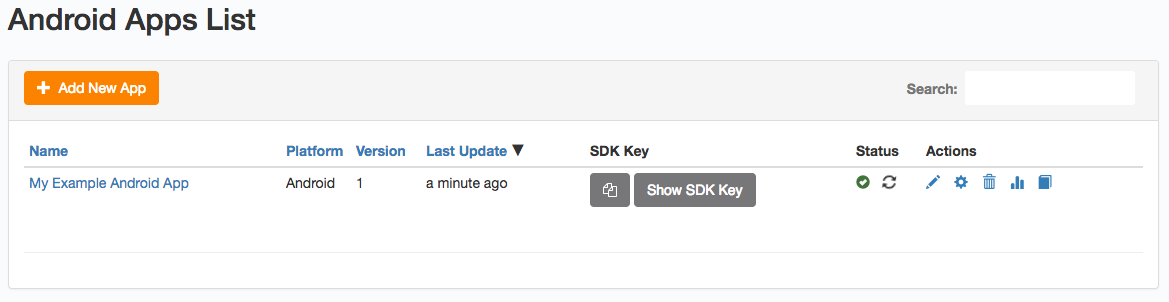
Step 7 - Access the SDK key by clicking on the eye icon. This will reveal the SDK key that will be used in the mobile App to initialize the nuu:bit SDK code.
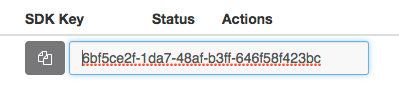
6bf5ce2f-1da7-48af-b3ff-646f58f423bc
Step 8 - Manifest (AndroidManifest.xml) will need the correct permission
<uses-permission android:name="android.permission.INTERNET" />
Step 9 - Add repository: you need to paste this in your root build.gradle file (not your module build.gradle file):
The following example has two maven repositories. Add the line for the mavin.revapm.com
allprojects {
    repositories {
        jcenter()
        maven { url 'https://maven.nuubit.net/' }
    }
}
Step 10 - Add library in the module build.gradle:
dependencies {
            // ... other dependencies here
            compile 'com.google.android.gms:play-services:10.2.1'
            compile 'com.squareup.retrofit2:converter-gson:2.1.0'
            compile project(path: ':NuubitSDK')
}
Step 11 - If you are using ProGuard you might need to add the following option in file proguard-rules.pro:
-dontwarn .** com.nuubit.sdk.*
Step 12 - Insert meta-data section with your key to project’s AndroidManifest.xml:
<meta-data android:name="com.nuubit.key" android:value="6bf5ce2f-1da7-48af-b3ff-646f58f423bc" />
Step 13 - All applications MUST HAVE a class that is an extension of NuubitApplication class that is an extension of Application class. In this example, we created a new file called SimpleAppIntegration.java which defines the class.
package com.simpleappintegration;
    import com.nuubit.sdk.NuubitApplication;
    public class SimpleAppIntegration extends NuubitApplication {
}
Set this class in AndroidManifest.xml and possibly replace the existing replacing package
<manifest xmlns:android="http://schemas.android.com/apk/res/android"
      package="com.simpleappintegration">

      <application
             android:name=".SimpleAppIntegration"
             // other parameters
      </application>
</manifest>
Step 14 - Initialize OkHttpClient by nuu:bit module
import com.nuubit.sdk.NuubitConstants; import com.nuubit.sdk.NuubitSDK; private void callSyncGet () { // Example protected Message doInBackground(Void... voids) { //OkHttpClient okHttpClient = new OkHttpClient(); // replace OkHttpClient standard Initialize with nuu:bit class OkHttpClient okHttpClient = NuubitSDK.OkHttpCreate(NuubitConstants.DEFAULT_TIMEOUT_SEC, false, false); }
Other examples could be the following:
   OkHttpClient client = NuubitSDK.createOkHttpClient(); // Example 1

   OkHttpClient client = NuubitSDK.createOkHttpClient(int default_timeout); // Example 2

   OkHttpClient client = NuubitSDK.createOkHttpClient(int default_timeout, boolean followRedirect, boolean followSSLRedirec); // Example 3
Step 15 - Change the code to use the new OkHttpClient object for data transfer calls (see examples below)
For use OKHttpClient directly http://square.github.io/okhttp/
GET method
OkHttpClient client = NuubitSDK.createOkHttpClient(15, false, false)

String run(String url) throws IOException {
 Request request = new Request.Builder()
     .url(url)
     .build();

 Response response = client.newCall(request).execute();
 return response.body().string();
}
POST method
OkHttpClient client = NuubitSDK.createOkHttpClient(10, false, false);

String post(String url, String json) throws IOException {
 RequestBody body = RequestBody.create(JSON, json);
 Request request = new Request.Builder()
     .url(url)
     .post(body)
     .build();
 Response response = client.newCall(request).execute();
 return response.b
Step 16 - Compile and deploy the mobile application
0 Comments